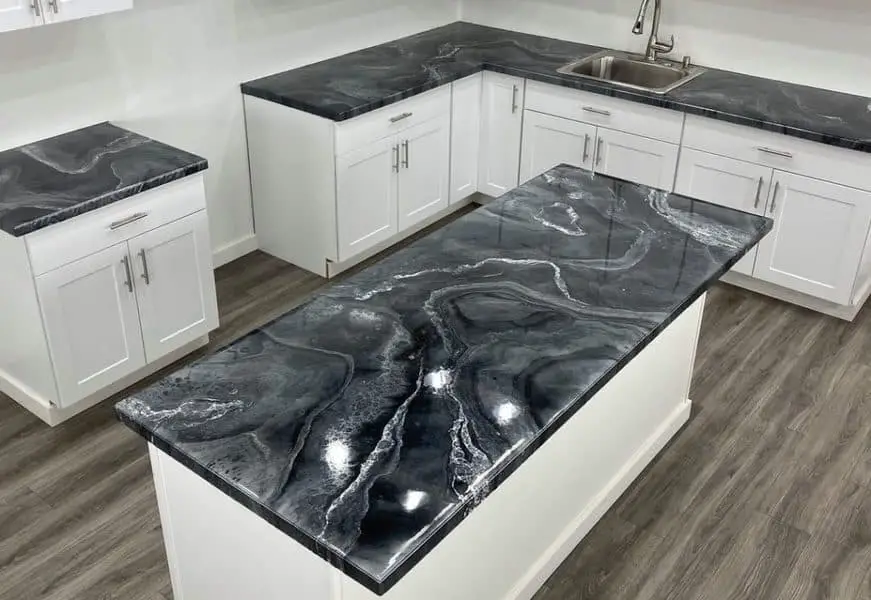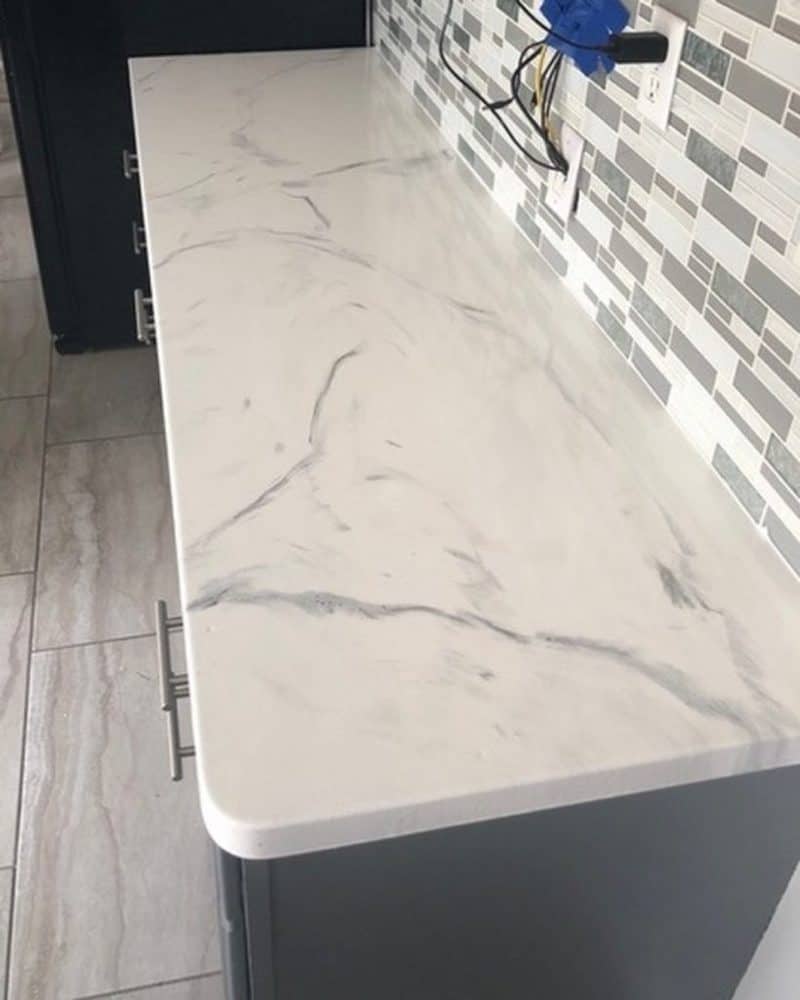
Thinking about buying an epoxy countertop but put off by the price? Well, why not make one yourself, then? It’s not as challenging as you might think, and you’ll have the satisfaction of knowing that you’ve got a truly unique product in your home. We’ll walk you through everything you need to know to get the job done well.
Our complete guide on how to make your epoxy countertops includes:
- Handling the sink and backsplash
- Routing corners
- Patching seams
- Sanding
- Masking
- Preparation
- Priming
- Highlights
- Pouring
- Rolling
- Keeping layers separated
- Feathering highlights
- Alcohol layer
- Drip removal
- Smoothing and top-coating
Of course, it’s a little more involved than that but we can guarantee that if you’re a reasonably handy person – you can build your own epoxy countertop and save a lot of money when compared to buying a pre-built one. In fact, some of these steps won’t be necessary depending on the style and state of your current counters.
Why Make An Epoxy Countertop?
Before we look at how to make an epoxy countertop – it might be worth touching on why you ought to have one:
- Ultra-durable finish. Epoxy is long-lasting and the surface will last for years without cracking, becoming dull or wearing away.
- High-gloss finish. That lovely wet look of marble can also be achieved with epoxy for much less money.
- Design it how you like. It’s a very versatile substance that can be easily patterned in any way that you want.
- Seamless finish. There are no ugly join lines when you make an epoxy countertop.
- Heat resistance. It’s important to note that you aren’t using a heat-proof material – you can place hot pans on epoxy for a brief period of time but you shouldn’t leave them sitting on there for long periods, it can discolor the epoxy.
- Non-toxic. Once the curing is finished and the room has been ventilated for a while, there are no toxins in the epoxy to contaminate your food with.
- Easy clean. You can clean epoxy with nearly any common household cleaning agent ad it won’t get damaged or worn.
- Anti-fungal and anti-bacterial. Epoxy is not porous, so there’s nowhere for moisture to hang out and allow bacteria and fungi to thrive.
The Tools For Making An Epoxy Countertop
You don’t need much in the way of tools to make an epoxy countertop and you may have most of these already laying around your workshop. If not, you can often rent them very cheaply:
- Brushes
- Drill (and drill bits)
- Orbital sander (and sandpaper as below)
- Oscillating Tool
- Paint Roller (6” preferred)
- Trim Router (maybe)
The Materials You Need For An Epoxy Countertop
You won’t need too many materials either:
- 2 x 2 Gallon marked buckets
- 2 x 6.375” nap roller sleeves
- 2 x paddle mixers
- 4 x 1-quart cups
- 60, 80 and 220 grit-sanding paper
- Card
- Epoxy resin and hardener
- Highlights as needed
- Isopropyl alcohol
- Painter’s tape
- Plastic sheeting
- Primer and hardener
- Spray bottle
- Stirring sticks
- Topcoat and hardener
- Wiping cloths
Ready to Make Your Own Epoxy Countertop? Check Out Our Recommended Epoxies for What Brands to Go With!
How To Make An Epoxy Countertop: A 16-step Guide
OK, let’s take a look at how you make an epoxy countertop with a marble-style finish. If you are careful to follow these steps, this isn’t as difficult as you might think it would be. However, there are a couple of moments in this process that are time-sensitive.
We’d also encourage you to review our tips below on the biggest mistakes people make (and how to avoid them, of course) when building epoxy countertops before you begin.
Get Rid Of The Backsplash (optional)
If you have a backsplash, then you’ll probably want to remove it if you want the look of a marble slab on your counter. This step is, of course, optional – if you’re not looking for that style, you can leave the backsplash in place.
You can always make sure the backsplash looks seamless by coating it at the same time (here is a video of that) just pay extra attention to the seam where they meet.

If you decide to remove the backsplash (recommended by me, but again, not necessary) you can use an oscillating tool (equipped with a carbide blade) and run down the length of the counter, making sure the final cut is flush with the surface.
Don’t forget to fill in any gap you’re leaving between the counter and the wall. For filling you could use a mixture of wood glue and sawdust, or wood filler. Then sand over the dried filler to even it out and keep it plush with the counter.
Remove Your Sink
Also, if you have a sink in the countertop – you must remove this before you start to pour any epoxy. This will help you tape properly, reach around areas, and protect your sing from being filled in.
Rout The Corners Of Your Countertop
While it is possible to do without this, epoxy doesn’t like sharp corners at all. It’ll run off it and you’ll end up with an ugly finish. It’s a much better idea to round the corners. Get a round over bit (we’d use a 1/8”, 1/4” or even a 3/8” bit) and a router. Anything that will keep the corner rounded enough for the epoxy to flow freely will do. Granite rarely (if ever) has a corner because it would be sharp (aka dangerous).
You want to allow the router to follow the natural shape of the countertop and not try and force a new path. If you find that your rounding bit isn’t delivering the results you want, increase the size slightly until it does. Don’t go overboard though.
Make Sure You Fill In The Gaps And Seams
It’s time to level everything off before you go any farther. You want to get some all-purpose body filler and get the gaps and seams filled in properly. Make sure to get to all the seams (miters, corners, any gap there is between the counter and any backsplash you’re using).
If there’s any particleboard in play that’s been brought out while you were cutting or routing – fill that too and then smooth the surface.
Don’t forget body filler is a fast hardening substance, so work in small blocks and make sure to work fast and efficiently.
Sand The Surface To Roughen It Up
You don’t want the epoxy to have to work to bond with your countertop at all. So, the easiest way to do this is to sand the countertop space with sandpaper.
However, before you do that – get rid of any bits of body filler that are poking out from when you fill in the gaps and seams with a paint scraper. This will make it much easier to sand.
Our preference is for 60-grit sandpaper for this job. You can get away sanding up to 320-grit before you will have a noticeably weaker bond with the epoxy.
Make sure to sand the top, rounded corners, and the leading edge thoroughly as this is where the epoxy will be most visible.
Mask Everything You Don’t Want to Get Ruined
Somewhere out there is someone who can work with epoxy without spilling it, but we’ve never met them. In truth, working with epoxy can look like a kid has gone mad with an epoxy-filled water pistol and that means you want to make sure that your epoxy only goes where it’s supposed to go.
So, it’s time to mask everything else. You can use plastic sheeting for this – tape it on the floor, drape it down the cabinets themselves, then tape it to the counter (you want to leave it under the leading edge for this).
Where the sink was, you should tape the plastic under the opening to catch any excess epoxy draining off. Then mask up all the kitchen walls (leave a small gap between the wall and the countertop – as you’re going to fill that with epoxy). Then, for safety’s sake, get some old cardboard boxes, flatten them and lay them under the counters (this will collect any spills or drips effectively).
Please note: now is the time some companies say to add tape to the edges – follow their directive!
Get The Materials Ready
Get yourself a little workbench (or a big workbench – this is your call) and set up everything that you will need neatly and easily on it. Last time I did a counter I used a plastic folding table that I didn’t mind getting messy.
Working with epoxy means working to the beat of the epoxy. You probably can’t stop in the middle and pop out to fetch something from the shop because when you do – your epoxy could set too much and you’ll have to chuck it out and start again, which costs a lot of money.
So, set everything up, check it off against our list at the top and scan the recipe – to make sure you haven’t missed anything and make sure it’s ready to be used.
Time To Put On The Primer
The clock starts as you apply the primer. So, don’t do this unless you’re sure that you have enough time to go through the rest of the steps right up until the very end. You don’t want to waste money unnecessarily by breaking off half-way through.
You want to mix the primer in a marked bucket (make sure that you’ve mixed the two parts in the correct proportion) and then roll it over the countertops, for the corners just cut in with a brush.
If you can still see the old color of the counter at this point – you should roll more primer on in an additional layer whilst the first layer is wet. Repeat if necessary.
Pre-Mix Your Highlights (optional)
Your primer is going to take about an hour before it gets to be fully tacky. So, while you’re hanging around for it – you can mix the metal powder for your highlights into the epoxy resin (not the hardener).
You don’t mix the hardener in until you’re ready to pour the epoxy. Why? Because it will begin to set in about 15 minutes and you’ll end up with a bucket full of resin rather than a countertop.
This isn’t absolutely necessary and probably isn’t considered “best practices” by most people. I have never had an issue doing it and doubt you will either.

Pour On The Base Coat Of Epoxy
Put on a glove and touch the primer, if it feels tacky and isn’t leaving any marks on the glover – you’re ready to pour out that base layer of epoxy.
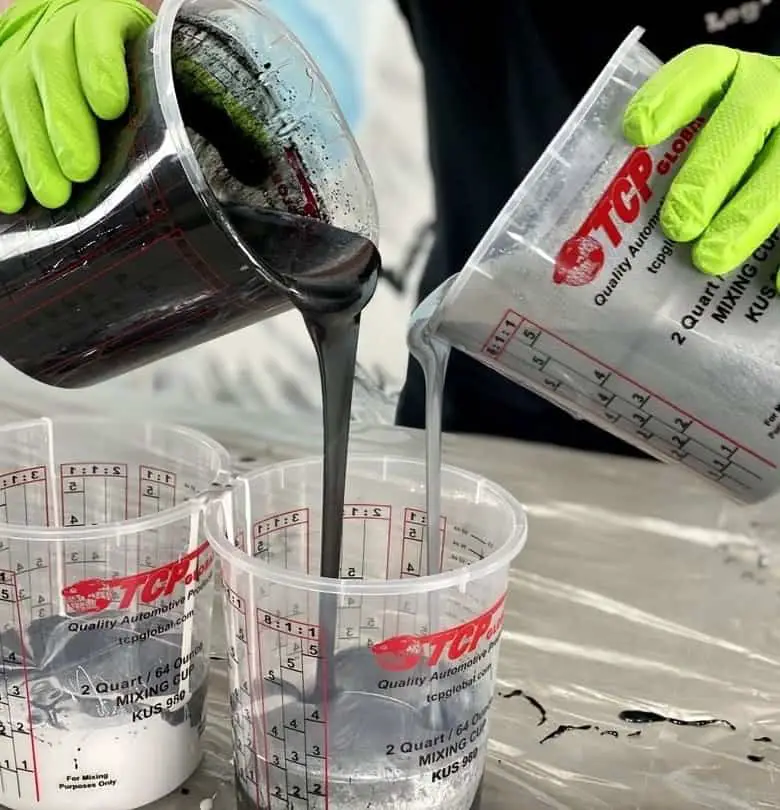
We recommend mixing your epoxy in two buckets (see later on for the mistakes that people make when using epoxy resin) and mixing it as thoroughly as you can with a paint stick, electric mixer, or anything similar that is clean and sturdy.
Once you’re happy that the mix is good – you can pour enough onto the countertop (start in the center and then spread the epoxy using a roller) to cover the whole surface.
Make sure that the epoxy is in the edges and the corners. You’re looking to create a layer that is 1/8” deep and completely even across the entire top. Thankfully, most brands are self-leveling so as long as your countertop is level, you won’t need to worry about it being too thin unless you don’t have enough.
Don’t Forget To Roll The Edges

Now, you want to make sure the side finishes as well as the top. You take a thin line of the epoxy and leave it along the top of the counter and the front, then use some of the remaining epoxy from your mixing bucket and roll it along the leading edge of the countertop.
Once that’s done give the thin line a little nudge so that it comes over the edge and joins the two together. Make sure that this leaves a nice even thickness of epoxy on the leading edge – you can add more or move what’s there around a bit until it cures.
If you added tape around the edges (recommended by some, I am impartial on this and would go with the brand you are using), now is the time to pull it off and let it get the edges.
Add Any Highlights
Now, it’s time to mix the highlights and just as you did with the base coat, you want to make sure that you have a very good mix. Once again, it is a real mistake to get unmixed epoxy on the countertop – so be thorough.
You then drizzle your highlights over the surface of the countertop (and make sure to let some drip down the edges). You can use a stirring stick to drizzle with or pour it straight on from your mixing vessel but we’d advise caution – you can always add a little more highlight to the countertop – you absolutely can’t remove any if you put too much on.
Take a step back and ask yourself, does this look like natural marble? Before you put any more highlights on.
Then Feather Your Highlights
You need to be gentle with this next bit because if you are too rough – you’ll end up forcing the highlights into the base coat where everything will start to look muddy rather than natural. Just gently go over the top of the highlights with a brush to give them a feathered look.
Pro-tip: If you don’t want it too blended, give it a few minutes before you do this – and allow the base epoxy to cure a little, it’s easier to avoid blending them.
Spray on Some Alcohol
Now, get that bottle of isopropyl alcohol and highlights that you made earlier and spray it over the countertop. This will help move the epoxy around naturally giving it a genuine marble veneer. You can spray a few times if you like, it’s hard to go overboard with this. Don’t forget to attend to the front of the counter too – otherwise, you’ll end up with an odd disconnect between the surfaces.
Get Rid Of Your Drips
Epoxy isn’t going to expand a lot but there will be a bit of runoff when you’re working with it. So, once you are done the highlights – you want to keep an eye on the corners. As they drain, you’ll find that there are little divots appearing which can be filled easily with some of your leftover epoxy.
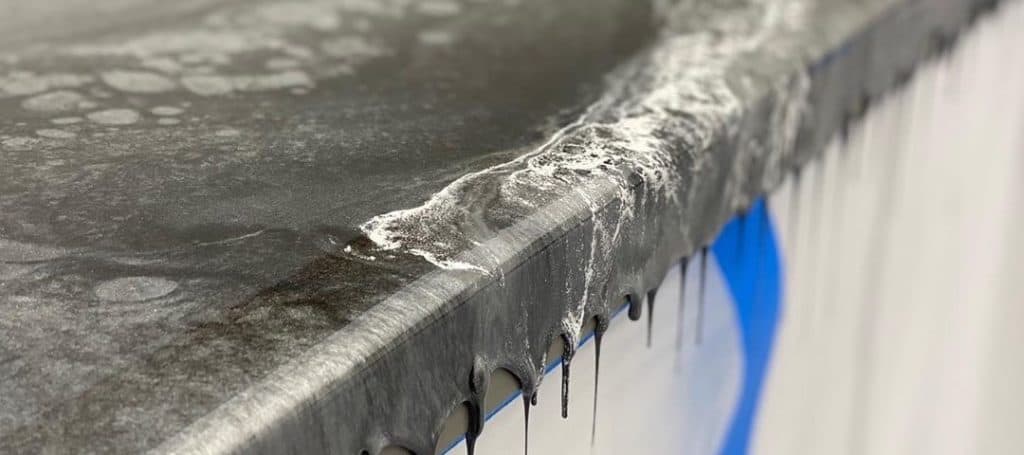
You also want to scrape off (use a stirring stick for this) any drips that start to hang down from the leading edge.
If you find any bugs or lumps of dust on the surface, you can use a toothpick to remove them.
Finally, for this day, at least, you can wait an hour and then remove all your masking around the backsplash area. It’s time to give it 20 hours for the epoxy to set properly.
Smooth Down The Top
The epoxy should not be fully cured when you return to the countertop. Get some 220-grit sandpaper and just go over any dust lumps that you find. If there are any drips along the bleeding edge you can use 80-grit sandpaper to tackle them
Then dust off the whole thing and wipe it clean with some of the denatured alcohol.
Add The Topcoat
It’s time to mix the topcoat which you will need to do in a container of sufficient size. Then cover the whole surface with a thick coat and spread it out quickly. Roll the surface in a single direction beginning with the backsplash and moving forward.
Then you need to wait a while (I suggest a week) for this coat to cure but when you do – it’ll be hard, ready to use and able to withstand scratches.
And that’s it! You have your very own, unique epoxy countertop!
Ready to Make Your Own Epoxy Countertop? Check Out Our Recommended Epoxies for What Brands to Go With!
The Biggest Mistakes People Make When Making An Epoxy Countertop
Before you get started building your countertop, it’s a good idea to sit down and work through the biggest common sources of error when making an epoxy countertop. If you go wrong, things are going to get very expensive, very quickly, so avoiding errors is vital.
Fortunately, there are only 5 major sources of error that most people face in this process and each of them is relatively easy to avoid.
Biggest mistakes people make when pouring an epoxy countertop:
- Pouring when the room is at the wrong temperature
- Failing to take enough time to mix the epoxy resin properly
- Not measuring up the volumes of epoxy and hardener correctly
- Failing to calculate how much epoxy you will need correctly
- Failing to prepare the surface for the epoxy properly
OK, so, let’s take a look at each of these, in turn, and see why they are a problem and how to go about avoiding them.
Getting The Wrong Pour Temperature
When epoxy cures it uses a thermosetting process which is exothermic (that is it gives out heat) to give that hard, durable finish that makes it the perfect choice for a countertop.
If you want it to cure properly, it must be poured when the room is at the right temperature. If the temperature is too low, the resin will form a soft rather than hard finish and you’ll get a countertop that marks whenever you put stuff on it.
If the temperature is too high, on the other hand, you’re going to end up with a countertop where the epoxy cures too quickly and that can lead to a brittle, damaged finish which is unattractive and not particularly durable.
So, you want to ensure that the room has some way to control the temperature and you want to keep the room at 70-74 degrees Fahrenheit for about 3 days prior to pouring the epoxy.
After you pour the epoxy, you want to keep this temperature for another 24 hours to allow it to cure properly.
Pouring Too Soon: You Must Mix For Long Enough
Now, we’ve nearly all made this mistake when working with epoxy for the first time. It’s one of the most common errors people make with epoxy but it’s a serious problem, all the same.
To ensure that your epoxy is mixed properly – the best way to approach things is to mix it for 3 minutes in a single container and then transfer it to a second container and mix it for another three minutes.
Use a paint stick for mixing rather than something like a drill paddle because, otherwise, you’re going to find that your epoxy ends up full of bubbles (and while it is possible to remove bubbles from poured epoxy – it’s a bit of a pain to do so).
Why are we doing all this? To prevent you from pouring unmixed resin onto the countertop area. If you do this, the unmixed portion can never cure. That means a sticky gooey spot that will last forever. Though, if you do make this mistake – you can put a clear coat of epoxy over the top to seal that stickiness in, however, it won’t look quite right when compared to the rest of the surface.
Failing To Measure Properly
We’re not talking about failing to measure your surfaces properly here, we’re talking about failing to measure the amount of epoxy you use to the amount of hardener you use.
For almost all countertop epoxies, you should be mixing in a 1:1 ratio. That is you use exactly the same amount of hardener as you do epoxy. You need to get this right. Use too much or too little hardener and you’ll either end up with soft epoxy or brittle epoxy as the finished product.
We recommend that you buy some clear one-gallon buckets from your local hardware store that have measuring scales on the outside. Sure, it sounds a bit like “mixing for dummies,” but we’re not proud – better to have really obvious prompts than a ruined countertop, right?
Getting The Epoxy Volumes Wrong
The amount of epoxy and the volume it will cover are very much dependent on the manufacturer, epoxy doesn’t tend to shrink or bulge very much – but there are variances between brands. So, you want to consult the instructions on how much epoxy you can pour from x amount of epoxy and x amount of hardener.
It is, as a general rule of thumb, better to have more epoxy than you need on hand when you pour than too little. It’s harder to fix a lack of epoxy – whereas if you have a bit too much, you can just dump it when the job’s finished.
That means to measure up properly. Check your calculations a few times and be confident that you have enough.
If you do find you get a thin uneven coat – don’t panic. The trick is to let it cure and then paint over it with a clear epoxy resin that will fill any of those “divots” that you’ve just created.
Poor Surface Preparation
Whenever you work with epoxy resin, preparing the surface is an essential part of the job. It is vital that you pay attention to how to do this and do it thoroughly. The preparation method will vary from material to material too.
If you don’t prepare the surface effectively, your epoxy will not bond well with it. This may mean that your countertop is not properly secured – which could be dangerous. Or it might mean that over time, you will get water and thus mold, etc. trapped beneath the worktop which is unsanitary and possibly even dangerous.
How Long Does It Take To Make An Epoxy Countertop?
In total, it takes just over a week to make an epoxy countertop because it takes a long while for the topcoat to cure. However, it’s fair to say that it’s not a week’s labor and once the preparation is done – it’s probably 3-4 hours’ worth of work if you follow these instructions closely.
The biggest consideration in this process is the curing time of the primer and epoxy layers – you need to ensure that you have the next tasks complete before they cure.
How Much Does It Cost To Make An Epoxy Countertop?
An epoxy countertop is not cheap but it’s worth it thanks to its durable properties. You can make an epoxy surface from around $45 per square foot whereas a high-quality granite top would cost about $225 a square foot and marble would cost even more. One thing to consider at the start of the process is how much budget you have – you can get cheaper coatings (such as plastic) but they won’t last as long.
Conclusion
So, that’s our step-by-step, how-to guide for making epoxy countertops – we hope that you found it useful and you feel ready to tackle the project of making your own epoxy countertop. It’s not as daunting as it first seems, the real key to this is preparation. If you have everything you need, when you need it – it’s actually a quite straightforward task.


