

Epoxy tables are one of the most beautiful and useful DIY projects you can make easily at home. Before you get started, you want to make sure you know everything entailed in an epoxy table.
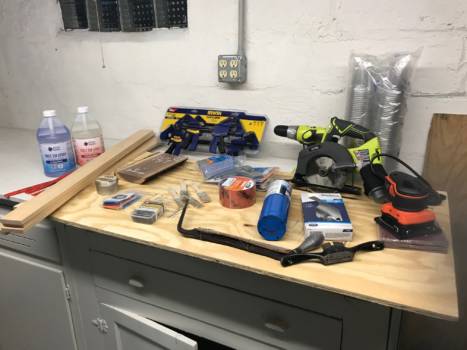
So what tools are actually needed to make an epoxy table? Surprisingly, not much is required. You will want at minimum a workspace, a sander, a painting bucket and stick, a chisel, and a saw. Although you can get away with the bare minimum, for larger projects there are a lot of inexpensive tools that can make the process much easier.
In this article I want to outline some of the main tools that you’ll want to have when making an epoxy table that will be necessary, or at least greatly increase productivity and beauty.
Update: In order to meet the questions of which tools I use, and which tools I recommend for someone getting into epoxy woodworking – I put together this Beginners Toolkit to give you guidance!
Sander
If you don’t have a single other power tool – get a sander. I didn’t start with a nice sander at all, I walked into Lowes and got the cheapest one on the shelf. It will work fine for what you want.
The sander is easily the most important power tool, especially on a large project like a table. There are multiple reasons for this. First, it sands down all the edges that have been planed and cut. This is necessary for the aesthetic you want. Second, if de-barking the slab, you’re going to need to sand to get down past the final layer of bark to the wood edge. Lastly, but incredibly important, if you mess up when pouring, you need to sand the epoxy in order to create a chemical bond for the re-pour.
Chisel or Shave Tool
This is going to be your best option for taking the bark off the edge. If you aren’t working with live edge slabs, skip this tool.
I personally prefer the shave tool. It is a lot smoother, less intense, quicker, and when done properly leaves less room for error. That being said, if you have a uniquely shaped piece of wood or very tough bark, the chisel would be the way to go.
Saw
You could use a hand saw, but most people will have (or get) a powered saw. I prefer to use a circular saw. This can be rigged to make a track saw fairly easily, but also allows more mobility if necessary. It is fine to use any type of saw that you feel comfortable with, however I suggest a table saw or circular saw if you don’t already have one picked out.
Mixing Supplies
For small pours, I will just use a plastic cup and a leftover (unused) chopstick from takeout food. If you are doing large pours you may want to invest in a large bucket and electric mixer. These attached to electric screwdrivers easily.
Workspace
This is an important one. Don’t ever let this be the reason you don’t make an epoxy and wood project of any kind. If you really want to do it, you will make it happen. I suggest finding a flat surface – like a table or desk – out of the way in a clean area to work on.
I will often either use an old cabinet in my basement or a foldout table in my garage. Don’t get to fancy, it’s the project that matters. You will need a piece of plywood with tape or HDPE to work on anyway to keep the epoxy from sticking to it.
An important note to this is that the cleanliness matters. You never want to make a huge pour only to have to dust or bugs get into it.
Screwdriver and Clamps
I make my molds most of the time with wood and sheathing tape. Although the screwdriver is used for mixing large pours, it can also be a part of making the mold tight.
Personally, I would rather use more clamps in creative ways than to have to screw boards together all the time. This is a personal (or financial) decision that you can make on your own though. Clamps can also be very useful in holding down the wood when you are making the pour so the bottom doesn’t get covered.
Honestly, that’s all I would suggest for your first and DIY pours. There are tons of tools that can help make the process easier, and small things for specific pours. But overall, you don’t need a lot, and many of these things you may very well have. There are other considerations below that go over common “next thoughts” on your epoxy table project!
How Long Will it Take to Make an Epoxy Table?
Plan for at least a week. If you have all the tools above you are going to need about 3-5 hours to prep the wood and make the mold. Then once you are ready to pour, that could take anywhere from 5 minutes to 24 hours. The reason I give such a spread is because each epoxy resin pours differently. You could have one that only does 1/8″ at a time with 3hrs between pours. Do your research, it is worth a little money for one that does a 1-2″ pour and saves you multiple trips (and less possibility to mess it up).
Steps to Making an Epoxy Resin Table
This is going to be a VERY bare bones overview, and depending on what you want there could be a few more or less steps. In general you will:
- Prep the wood
- Make the mold
- Set everything up
- Prepare the epoxy resin
- Make the pour (and more pours)
- Take the project from the mold
- Sand it down
- Finish the wood/epoxy
You want to make sure you have a very clear idea of what you want the end product to be. Be ready to skip and add steps as new challenges arise, and know that this is all part of the process of a beautiful masterpiece. It is really worth making an epoxy and wooden table if you have the ability to do so.
