

With the new trend in live edge slabs and epoxy, it makes sense that this would be one of my first choices. This post is about my journey through the process my first time. I will be adding tips and tricks, including things I wish I knew and things I could have done better/more efficiently.
The process of making the live edge table consists of:
- Get Your Slab
- Debark the Wood
- Sand the Wood
- Prepare Your Area for Epoxy
- Seal the Wood
- Pour the Epoxy (And Wait)
- Add Finishing Touches
Get Your Slab
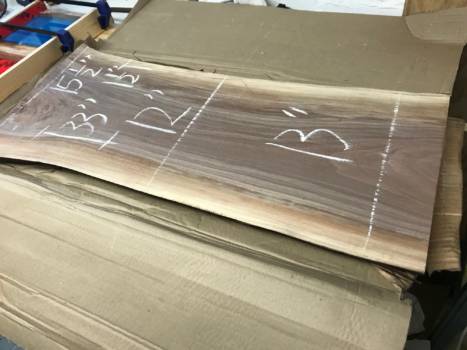
I got this black walnut slab off Etsy.. although it may be helpful to view my post on finding live edge slabs, as this was not the cheapest I could have gotten it.
Make sure you do research on what type of wood you want, getting a cheap piece of wood, or one that gets way darker than expected when covered will be an unpleasant surprise.
Debark the Wood
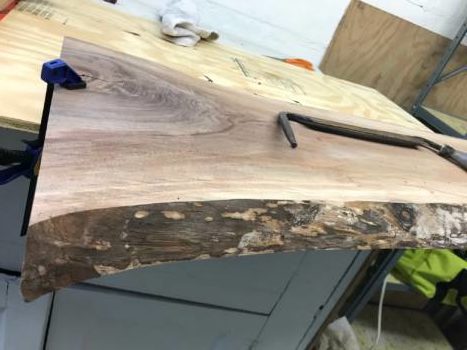
This is important for most people. Although you can leave bark on, it is less strong and likely to break in the future. I wanted this coffee table to last a long time, so I decided not to go this route. If you do want to have bark, you will most likely want to coat both sides with epoxy.
You can debark the wood in many ways, the most popular seem to be the chisel, and the draw knife. I got this draw knife at an antique store, but you can find one on Amazon just as easily and affordably.
Just pull with the draw knife to get off all the large chunks. Be careful don’t be too worried about gentleness, most wood will hold up great. After the majority of the bark is off, use a sander to get down to the wood, making sure not to leave little pieces. If there are odd angles that you couldn’t get as well, try using something like a wire brush that attaches to your drill. This will easily get in there and scrape off tough to get spots.
If you happen to scrape it too much, it’s okay, you can sand it down and still make it look natural.
Sand the Wood
This one is more an obvious step, but you just want to make sure you sand the wood. Don’t go too high, but 220 grit should make it smooth everywhere but also able to bond with the epoxy.
If you sand it down too much and at too high a grit, it could make it less able to bond with the epoxy. This is unlikely to cause any issues, but may keep the table from lasting as long into the future.
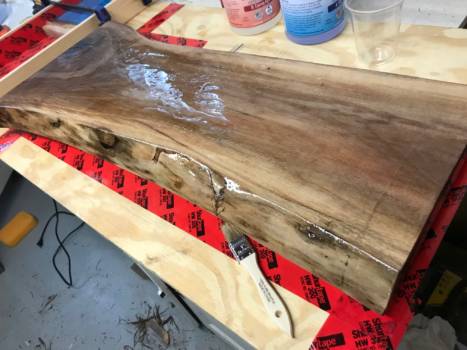
Prepare Your Area for Epoxy
Make sure you clean up all bark and sawdust, anything that could get into the epoxy is a bad idea. You want to make sure you’re in a clean are. Because this is just a pour-over piece, I made a super simple setup.
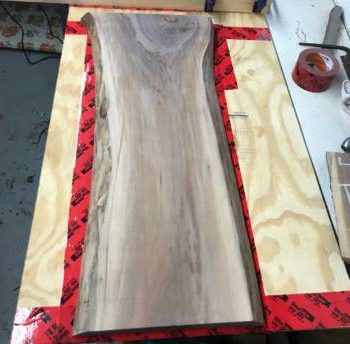
I started with a piece of plywood large enough to hold the whole thing. Then, I put the wood slab on top of a much smaller pice of wood. Where the edges were, I put sheathing tape all around. I did this for all the drips that drop off the edges after the pour. This way I can re-use the plywood. We are now ready to apply epoxy.
Note: this was not enough tape – the amount that dripped off was much more than this amount of tape.
Seal the Wood
For this project, I am using Table Top Epoxy that I just got off Amazon – this is one of the most popular epoxy’s for coating tables, bars, and slabs. This epoxy doesn’t require a special seal on the wood, I was able to just use a very thin coat of the epoxy on it first.
If you don’t have this type of epoxy, you may want to purchase some sort of sealer off Amazon or at the local store.
Sealing the wood helps the epoxy stick, and also allows for a stronger bond with the epoxy coating.
I spread it out with a brush, taking care to get all the cracks and divots especially. This will leave it shiny all around.
Pour the Epoxy (And Wait)
Before the seal coat dries, you want to pour on the thicker coat of epoxy. This is easy, simply mix the epoxy and hardener at a 1:1 ratio (I did so in a plastic cup with a chopstick as a stirrer), and then pour it over. To spread it around and to make sure it flows over the sides evenly, use a rubber glove and spread it with your hand. For this table, I did a second pour a minute later to try to get the flat/cut sides well. After 5-10 minutes, make sure you quickly run a blow torch on it to get rid of bubbles.
You want to give this however long your epoxy says – but for me I left it a whole week for maximum hardness. You can check it after a couple days and it should be hard enough to work with.
Add Finishing Touches
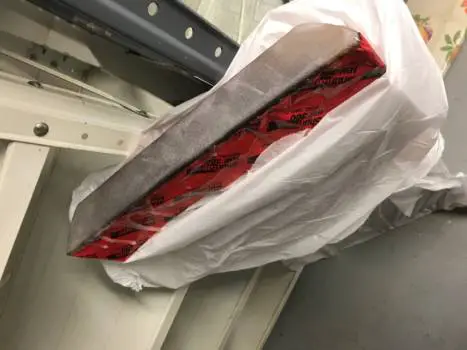
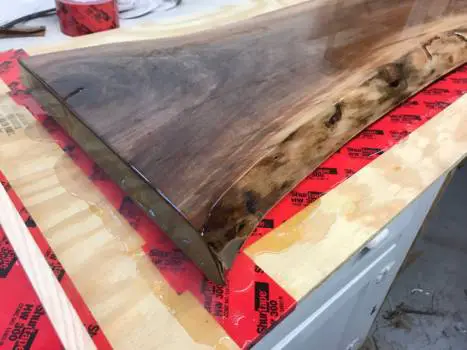
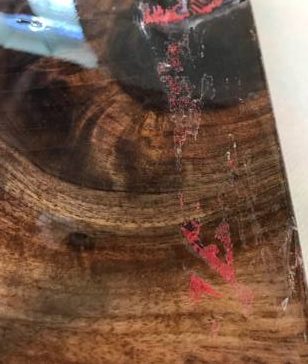
This step has a lot of parts going on. The first one, is to finish the edges. When they came out, the epoxy had dripped off/soaked in at a much higher rate than the rest. Because of this, it was not a glossy coat. My solution was to cover the board with a plastic bag and sheathing tape. After this I did another simple pour. Make sure to run the blow torch over it again. This time I let it sit for about 2 days before flipping over and doing the side.
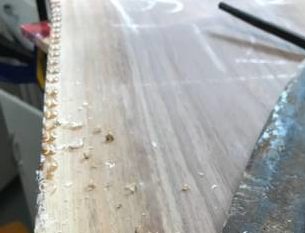
After I allowed the edges to dry, I went ahead and began working on the drip marks. (Note: after this, I began taping the bottom of the board so the drips would easily peal off). For this I used the pull knife at first, combined with the chisel for more careful parts, and the sander to finish the job. This made the bottom of the table smooth and flat, without any epoxy dripping off.
The last thing I did was polish the top, for this I used a little oil, which got off any sticky from tape. Then I just took a soapy paper towel and cleaned off the oil and dried it. After this was clean and polished I went ahead and added the table legs.
The legs are just hairpin legs I got off Amazon – although you can also find them on Etsy and Ebay. Anything from a local store will be way over priced. Some coffee tables won’t look good unless they have bigger legs, these can be purchased at hardware stores but it would be better to shop around.
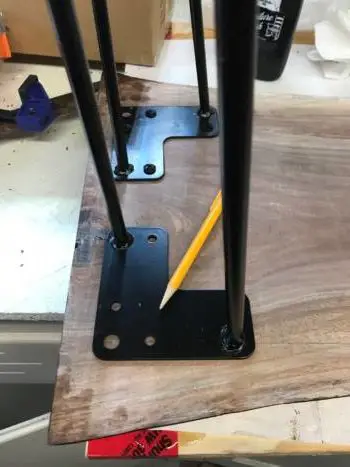
Luckily, these came with screws that fit perfectly. Usually I would add setting screws to it, but because this wasn’t a table being sold, or a large table, so I just drilled holes and screwed in the legs. To line it up with the uneven edges, I used a square that I got at a flea market, and just made a straight line on the thinner side. This way they are in the same spot even though different lengths from the edge.
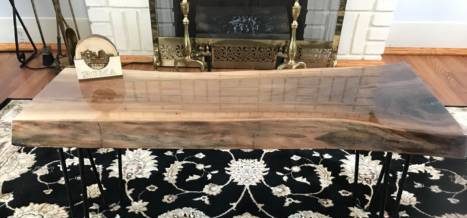
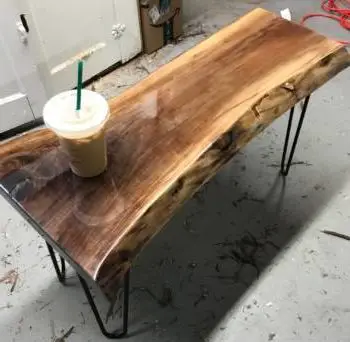
And Voila!
The final finished piece on the ground where it was worked on. Complete with coffee and all. That’s a pretty good lookin’ table.
What Does a Live Edge Slab Coffee Table Cost?
Well, it could be anywhere from $75-$350 on average. This number will be mostly determined by whether you buy or build. If you buy, expect to pay higher prices, making tables is a skill and a time-consuming process. You should expect between $150-$300 for buying. If you are able to build, it depends on materials. The Epoxy could be just a small amount (less than 1/4 gal for this project. The wood should be able to be found cheap (this one was about $80). The final thing that determines the cost will be the legs, these can be very pricey for custom ones or those at hardware stores.
How Long Does it Take to Make a Live Edge Slab Coffee Table?
Usually about 7-10 days. Curing time for epoxy is going to average 5 days, and then if you add a work day on the beginning and end, you get the minimum of 7. It could be done more quickly as you aren’t working on the epoxy itself, and it could take way longer if you have days off or want to let the epoxy cure longer. This one took me about 12 days because I let it sit for a full week before finishing it, and then I had to redo both edges.
All in all, allowing yourself extra time will always be the best way to go with your first project. I also suggest doing small pours to make sure you know how your epoxy coats as well.
How Long Will My Epoxy and Wood Project Last?
In general, you can expect a well made project to last up to 20 years or more. Although, this has many caveats. Things that will increase epoxy life are making sure the wood is dry, getting all the bark off, sealing all sides, and mixing the epoxy well. There are plenty of other ways to increase life, and many things to look out for. For more information on this, please check out this article on life of epoxy projects.
