

If you’ve got two pieces of wood to join together then you have a lot of options on how to do it. There’s often a big debate over whether you should use epoxy or wood glue to do the job but, in fact, there shouldn’t be. Each glue is designed for a specific use and we’ll show you how to choose the right one for your job.
Epoxy Glue Or Wood Glue? How to decide? Well, there are 5 types of glue that you can use to glue wood with and there are 12 factors which will help you decide which to use: the strength of bond, the clamp time, the closed assembly time, the chalk temperature, the temperature stability, the open assembly time, the speed of glue setting, the squeeze-out volume, the odds of a starved joint, the shelf life, the tackiness and the total assembly time.
Once you’ve worked your way through our guide, you’ll be in a great place to decide what glue’s right for your project and then to round things off, we’ll show you how to glue with epoxy in a simple and straightforward way to get the best results in your woodworking project.
The 5 Types Of Wood Glue
There are 5 main choices when it comes to buying glue for wood:
- Polyvinyl Acetate (PVA) Wood Glue
- Cyanoacrylate (CA) Glue
- Epoxy
- Polyurethane Glue
- Hide Glue
Poly-Vinyl Acetate (PVA) Wood Glue: Cheap & Cheerful

We love epoxy, as you will know if you’ve spent any time on this site, but the first type of glue that gets considered in wood working projects is usually poly-vinyl acetate (PVA) wood glue and for good reasons.
- It’s cheap. This doesn’t mean that we’re recommending cutting corners though, PVA is cheap because it gets used a lot and is made in large quantities and it’s relatively easy to make.
- It’s non-toxic. PVA cures to basic non-toxic plastic. You shouldn’t eat it or cover your whole body in it but it is non-toxic and thus fairly safe to work with.
- It’s easy to find. PVA’s popularity means that you can find it at just about any hardware store.
- It’s easy to clean up with water. You can’t argue with the fact that you just need a little water to remove spills, etc. it just makes working with PVA that much easier because you’re not worried about ruining anything.
- It has a modest level of tack. This means that when you’re working with PVA, you can reposition the wood that you’re working with quite easily. Yet, after it’s cured, the bond is strong.
- You can find a range of PVA glues. You can find different PVA glues for different jobs – this can make choosing the right one slightly confusing and it’s important to read the labels. There are indoor glues, outdoor glues, waterproof glues, etc.
Cyanoacrylate (CA) Glue: Small Fix Specialist

You probably already have some cyanoacrylate (CA) glue around the home, you just don’t call it that. You call it “Krazy Glue” or “Super Glue”, instead. CA is a general term which incorporates almost all quick-bonding “super glues”.
You also, probably, know from experience that you can glue pretty much anything with superglue from metals to wood to human flesh.
CA is made from an acrylic resin which cures to a rigid plastic form. It has an odd property, in that it can only bond with a surface when there is some moisture on it. If there’s no water present, it will fail to stick to the surface in any way.
With water present, however, bonding and curing take place very quickly in an exothermic reaction (e.g. it gives off heat).
CA is known as super glue because of the incredible strength of these bonds. Sadly, for you, if your skin is involved in the bonding process.
This glue is more expensive than other glues used in woodworking and because of the potential pitfalls of working with it – it tends only to be used for small repairs (such as when you’re carving or turning wood) rather than for bigger bonds.
We’d recommend getting some woodworking gel CA rather than the old school super glue tubes which can lead to the glue running all over the place while you use it.
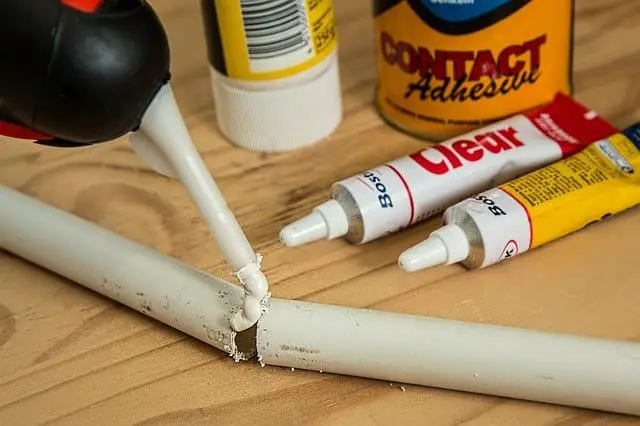
Epoxy Glue: Durable & Hardwearing

So, our next stop on the tour of wood glues is epoxy which is not, technically, a glue but rather a resin which is combined with a hardening agent to form a bond. Epoxy is often used for creating surfaces on wood because of its strong resistance to water and to chemical reactions once it has cured.
It is not as cheap as PVA and because it comes in two parts, it’s not quite as easy to work with either. That means you’re not going to pick epoxy for every woodworking project that requires glue but there is one area in which epoxy far outshines its counterparts.
That’s when you’re working with a substantial gap either at the join or elsewhere in the wood. Epoxy will happily fill these gaps and create a strong and lasting bond. Whereas most glues will not fill the gaps and thus, any bond you create is likely to be much weaker and much less likely to last.
It’s worth remembering, however, that there is a longer curing time when you use epoxy and that even the mildest forms of epoxy are going to need 5 minutes before the bond hardens. There is also a direct relationship between curing time and the strength of the end product and if you’re working with particularly weak wood – you may need to allow up to 2 days for curing your epoxy!
My favorite way to use epoxy glue is to use quick curing epoxy glue to fill in cracks on projects where the surface isn’t smooth for some reason.
Polyurethane: Water Master

Polyurethane glue is one of the most durable wood glues but there are many reasons that it’s not many woodworkers’ first port of call when reaching for a glue gun. You may already have some of this product – it is often called by the main brand name “Gorilla Glue”.
It’s worth noting that you don’t need to buy Gorilla Glue to buy a good quality polyurethane glue and looking for a generic version may save you a few bucks in the hardware store.
Polyurethane, rather like super glue, requires water to cure and, in fact, most people will wet the two surfaces they intend to join prior to adding the glue. It will happily bond to wood as well as plastics, fabrics, metals and many other materials.
You have to be careful when you use polyurethane as it tends to expand while it cures which can lead to it bulging out of joints or even fracturing them. You need to keep a close eye on it and wipe away any “squeeze out” as fast as possible because once it’s cured, it becomes rock hard and is very difficult to dislodge.
Most people will turn to polyurethane for outdoor use because it’s very strong and enduring. Our yard furniture has quite a bit of polyurethane glue secreted about it, for example.
Hide Glue: Reversibility

Yes, as the name suggests this glue is created from animal hides. It often comes in flakes, granules or even flat sheets. You can keep this glue pretty much forever as long as you don’t allow it to get wet.
When you want to use it, you dissolve it in hot water (about 140 degrees Fahrenheit) but not too hot because very high temperatures can destroy the property of the glue.
It is worth noting that the “open time” of hide glue is particularly important and once the temperature drops – the glue starts to lose its properties too. So, you need to use the glue at the right temperature and hold the pieces together to ensure they bond while the glue is still effective.
As you might expect, this makes hide glue one of the last options in a woodworker’s glue cabinet. However, it has a very useful property in that if you need to – you can heat the glue up again and it reverts to liquid, which means if you want to undo the bond at a later stage, you can.
We find that we don’t use hide glue very often but that sometimes, it’s the only sensible choice for a very specific use.
Epoxy Vs Wood Glue? How To Decide (The 12 Factors For Choosing A Glue For Wood)
There are 12 simple factors that should help you decide which glue to use on your woodworking project:
- The strength of the bond required. It shouldn’t come as any surprise, but the strength of the bond is the most important factor to consider before choosing the right glue – that means how much load is the join required to take under compression, peel, impact, tension, etc. before the join should fail? This is generally given as a number in pounders per square inch (that’s PSI).
- The time that you can clamp the substrates together. Some glues allow you to clamp for much less time than others. Don’t forget that epoxy may need clamping for quite some time during the curing process if you’re going for a particularly strong bond.
- The time you require for closed assembly. This is the time period which begins when you place the two surfaces together with the glue between them and before you clamp. I.e. it’s the amount of time you have to make adjustments to the position of either piece before you clamp them into place.
- The “chalk temperature” of the glue involved. Chalk temperature is the temperature which results in the loss of water from the glue during the curing process. Chalking refers to the chalky cloudy texture of the final product which is nowhere near as strong as you might want it to be. A chalked glue can result in the complete failure of the join.
- The stability of the glue when frozen and then thawed. Some glues don’t take well to being frozen and then thawed out again. If wood glue is in storage and its frozen and thawed a few times it might look like cottage cheese when you open it. This is nothing to worry about, just stir it vigorously until it goes back to the original appearance.
- The “open assembly” period. This is the time you have from adding the glue to your surfaces and putting those two surfaces together. For some glues, such as a long curing epoxy, this can be a very long period for others, such as super glue, it may only be a few seconds.
- The speed that the glue sets. This is the rate at which the cured glue gains strength. For superglue this will be very fast, for a 48-hour epoxy – it’s going to be very slow with most other glues coming somewhere between the two.
- The volume of “squeeze out” that is produced. Squeeze out is the glue that leaks from the join during the process of clamping the two surfaces and/or the curing of the glue. Some glues are much more prone to “squeeze out” than others. Squeeze out is less of a problem if you can access the join easily and clean it up quickly during the curing process.
- The likelihood of a “starved joint” forming. A starved joint is what happens when there’s not enough glue left on the surface of the materials to create an effective bond between them. This can be a common problem when working with epoxy and you really need to soak the joint to avoid it.
- The shelf life of the adhesive. Some glues will store forever, and others won’t. You want to try and buy glue that’s going to last long enough for you to use it all up if you want to keep your money in your pockets rather than the glue manufacturers.
- The tackiness of the adhesive. This is the property of the strength of the bond between two glued surfaces when they first come into contact and kept there under a low (non-clamped) pressure.
- The complete time for the assembly. This the amount of time you have from the moment you apply the glue to the surfaces until you clamp them together.
How To Use Epoxy To Bond Wood
If you do decide to use epoxy to bond your wood, then it’s quite a simple process to carry out.
Avoiding “Starvation” At The Joint
You must allow the epoxy to soak into the wood. One of the joys of working with epoxy as an adhesive is that it will fill gaps in the wood but it also means that if you don’t let it soak in – you risk starving the joint and if that happens, you’re going to end up with a fragile join at best.
Don’t Use Acidic/Oily Timbers
Most epoxy products do not get on well with oily or acidic surfaces on woods and they won’t cure in contact with acidic wood and can’t stick to oily woods. As you might expect, this is a recipe for a failed joint.
Avoid Solvent Cleaning
Don’t try and clean any oil off the wood with a solvent. It won’t work very well, and the solvents are just as likely to react with the epoxy and cause the joint to fail anyway.
Clamping To Improve The Bond
Whenever possible, you want to clamp the wood together after you’ve applied the epoxy so that you can achieve the strongest join.
Make Sure The Pieces Fit
If your pieces don’t fit well in the first place, then all clamping will do is bend them into place temporarily until you take the clamps off and they try to spring back into place. It’s quite possible that this will either split the wood or rip out the epoxy join.
Avoid “Squeeze Out”
You don’t want to clamp so tightly that the epoxy is forced out of the joint, either. The idea is to bring the two surfaces together to allow a bond to form not to get rid of the glue which is essential to the bond forming.
Working With Weak Timber
If you’re working with a weak timber – it’s best to use an epoxy sealing product prior to trying to use epoxy to glue the timber to something else. This is because a join is only as strong as the weakest part of the join.
Mix The Two Halves Effectively
The better you mix the two-halves of your epoxy, the better the epoxy will cure and the stronger the bond will be. We often use two containers and pour epoxy from one to the other and mix twice.
Work Safely
Always, make sure to wear the right personal protective equipment when working with epoxy, particularly if you are working indoors.
Conclusion
Epoxy Glue Or Wood Glue? How to decide? As you can see, it really comes down to the project you are working on. Epoxy is the perfect choice if you have time for it to cure and are looking to create a strong bond on a weaker wood, but it may be cheaper or easier to use a different glue in other uses cases.
We hope that our guide has helped you decide which glue is right for your current project.
